Blog
Best Practices for Routine In-Office Sterilizer Efficacy Monitoring

Follow These Steps to Achieve Sterility Assurance for Your Table-Top Steam Sterilizers
Routine sterilizer efficacy monitoring is a critical element of your practice’s infection prevention and control protocol. Steam sterilization is, of course, a routine part of instrument reprocessing, and it’s important to ensure your sterilizer is functioning properly for every load. As a result, there are certain steps you should be taking monthly, daily, and per each load to achieve sterility assurance.
Although sterility assurance best practices have not changed in the wake of the COVID-19 pandemic, attention towards infection prevention practices is greater than ever. Sterility assurance should already be a routine part of your instrument reprocessing cycle, but it can be useful to review each step to ensure best practices. To help, we developed a checklist for testing procedures. Utilize this resource to ensure you’re following the right procedures for daily sterilizer efficacy monitoring.
Selecting the appropriate sterilization packaging material for a Biological Indicator (BI) test pack

To achieve best practices, in-office biological monitoring should be done daily (or at a minimum at least weekly). When doing biological monitoring, your first step should be to create a test pack that best represents the loads that are routinely processed. That typically means either a self-seal pouch or blue CSR wrapped cassette. The testing procedure checklist provides detailed steps for both options, but regardless of your choice it’s important to remember to record the sterilizer number, load number, and processing date on the test Biological Indicator (BI) vial label. Additionally, be sure to include a Type 5 Chemical Integrating Indicator in your test.
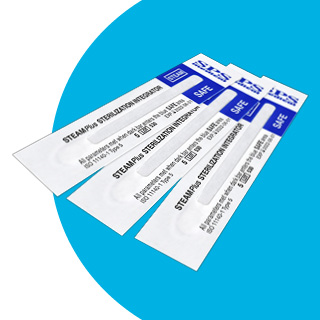
Including a Type 5 Chemical Indicator (CI) provides immediate feedback that all critical variables are met for proper instrument sterilization (time, temperature, and saturated steam), allowing safe load release. These CIs can and should be included in every load (in addition to this daily test load) as an added layer of sterility assurance.
BI Test Pack Procedures
Once the BI test pack is assembled, follow these procedures for processing your test pack. Be sure to refer back to the checklist for additional details on each step.
- Label the test pack with the sterilizer number, the date, load number and “TEST” (to identify it post sterilization) before being exposed to the sterilization cycle.
- Place the BI test pack in a fully loaded chamber. It should be positioned in the location of the sterilizer chamber that is least favorable to sterilization. This area, known as the “cold point,” is normally in the center of the load toward the front of the chamber. Always check the sterilizer’s operator manual for details on correct BI test pack loading and placement.
- Run a normal instrument cycle according to the sterilizer’s operator manual.
-
Upon completion of the sterilization cycle and cooling of the BI test pack to room temperature, remove the test BI and Type 5 integrating indicator, visually inspect the indicators to confirm passing visual results, and incubate the test BI.
- When test BIs are run, one BI from the same lot number that has not been exposed to the sterilization cycle should also be labeled, crushed, and incubated at the same time as the test BI. This additional BI acts as a control to verify the viability of the test spores and proper BI incubation.
- Upon completion of incubation, the test BI and control BI results should be observed. There are four results to look for:
- If the processed test BI turns yellow (positive: spores have grown), the load has failed sterilization as the spores survived. Before running another load, the cause of the failure should be identified and corrected, and the load reprocessed. When this occurs, report results immediately to your supervisor.
- If the processed test BI from a lot remains purple (negative: spores were killed and failed to grow), that is evidence of a successful sterilization event.
- If the control BI from a lot remains purple (negative: spores fail to grow), the BIs from the lot are either nonviable, or improper BI incubation has occurred. The results from the test BIs should be considered invalid and the test repeated to confirm failure. When this occurs, report results immediately to your supervisor.
- If the control BI from a lot transitions to yellow (positive: spores have grown, proving they are viable), that is evidence of a properly responding BI and a correct incubation procedure.
- Record results into a record notebook and include the following: test date, sterilizer number, load number, incubation date, test BI results (- or +), control BI results (- or +), and operator initials.
Additional Procedures to Follow for Sterilizer Efficacy Monitoring
In addition to these daily procedures or when proof of compliance must be provided, supplement your in-office monitoring with third party spore strip testing and documentation for an unbiased independent test. This is an effective way to ensure that your practice’s sterility assurance system is beyond question. The combination of weekly or daily in-office BI monitoring with weekly or monthly third-party testing ensures that layers of protection are in place for your practice and patients’ safety and peace of mind.
When you use ConFirm™ Premium Test Service Mail-in Sterilizer Indicators, our customer care consultants will contact you immediately if a mail-in test fails and assist your staff with determining what may have happened and how to prevent future failures.
Finally, for dynamic air removal sterilizers with pre-vacuum air removal, run a daily Bowie-Dick air removal test pack every morning prior to the first load to confirm complete elimination of air from the chamber (the heavier air impedes steam from fully entering the chamber and sterilizing instruments).
Recommended Sterility Assurance Products
Now that we’ve reviewed best practices for routine sterilizer efficacy monitoring, let’s recap some of the recommended sterility assurance products you’ll need:
- Sure-Check™ Self-Seal Sterilization Pouches or Duo-Check™ Self-Seal Sterilization Pouches – For creating a biological monitoring test pack.
- SteamPlus™ Type 5 Integrating Indicators – For immediate release of non-implant sterilization loads or packs.
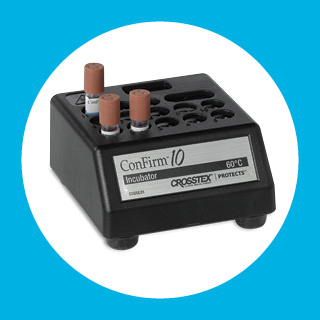
- ConFirm™ 10 In-Office Biological Monitoring System or ConFirm™ 24 In-Office Biological Monitoring System – Provides 10- or 24-hour BI monitoring results, respectively.
- ConFirm™ Premium or Value Mail-in Service – Supports 3rd-party validation of sterilizer monitoring.
- AirView™ II Bowie-Dick Test – Air removal test for pre-vacuum dynamic air removal sterilizers.
All company and product names are trademarks of Hu-Friedy Mfg. Co., LLC, its affiliates or related companies, unless otherwise noted.

